In realtime computer graphics, a texture atlas is a large image containing a collection of sub-images, each of which is a texture map for some part of a 2D or 3D model. A Texture Atlas describes the method of packing many separate textures together into a single texture.
In my recent project, I need load a lot of 3D models in cesium (A WebGL Virtual Globe and Map Engine) which greatly affect the performance of browser. So I want to pack many separate textures of a 3D building model together into a single texture.
Let’s go.
- Import a model,and create a new UV maps.
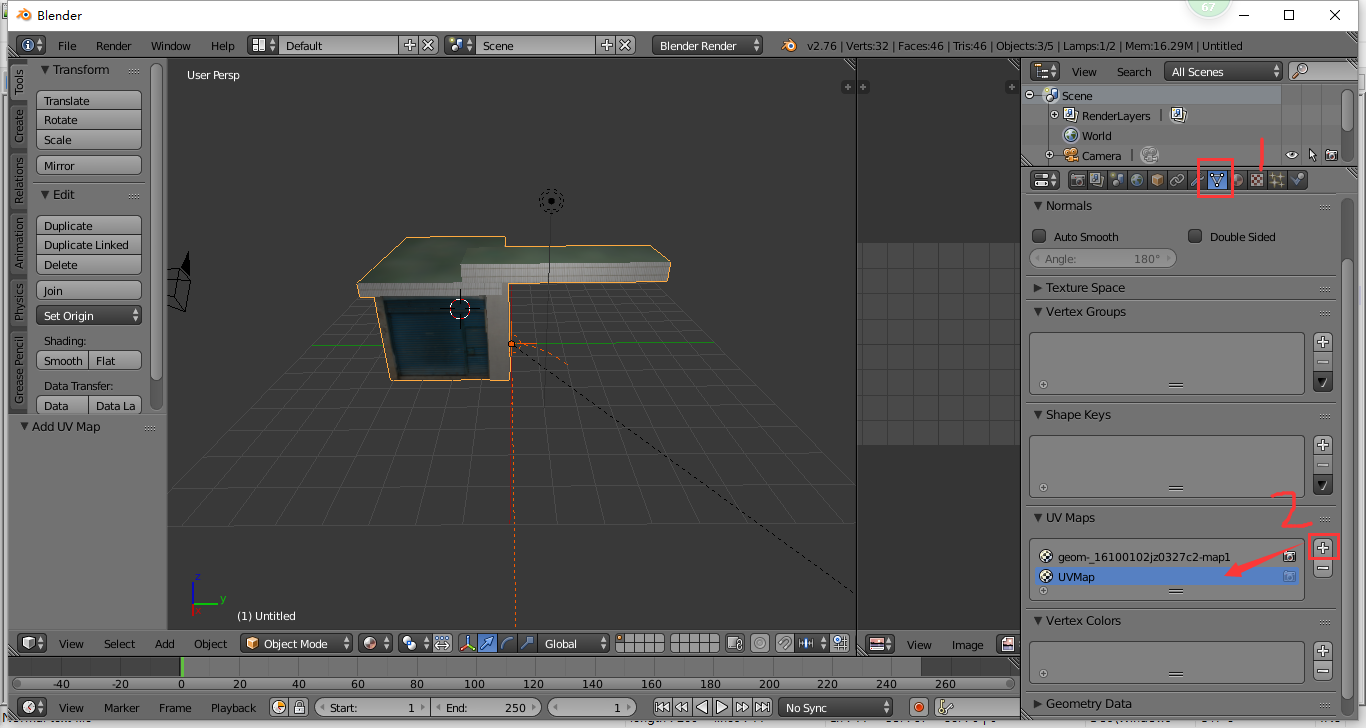 create a new UV maps
- Press “Tab” key,enter the Edit Mode.
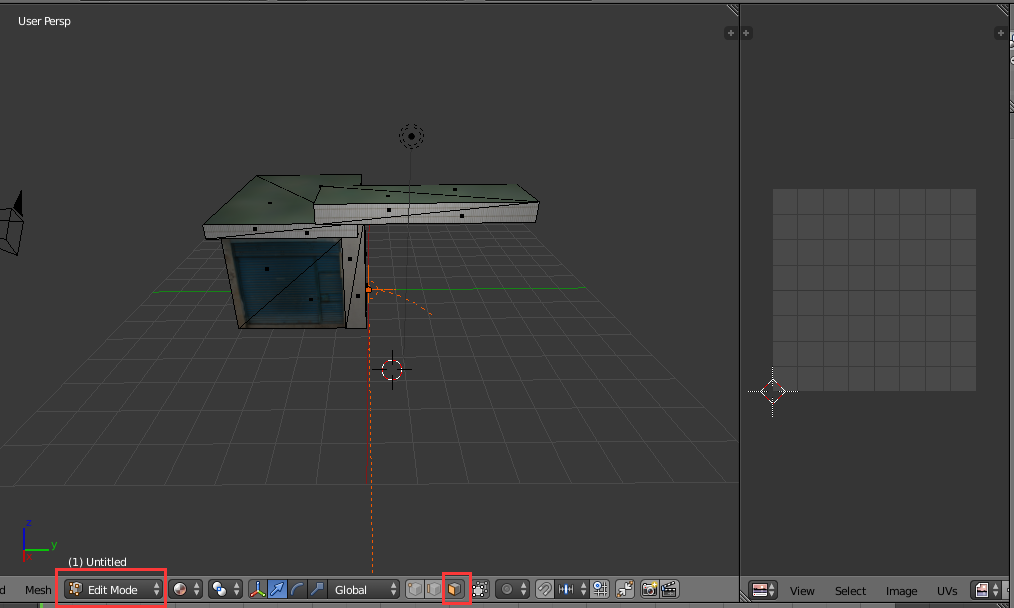 enter the Edit mode
- Press “A”,select all the faces of the model.
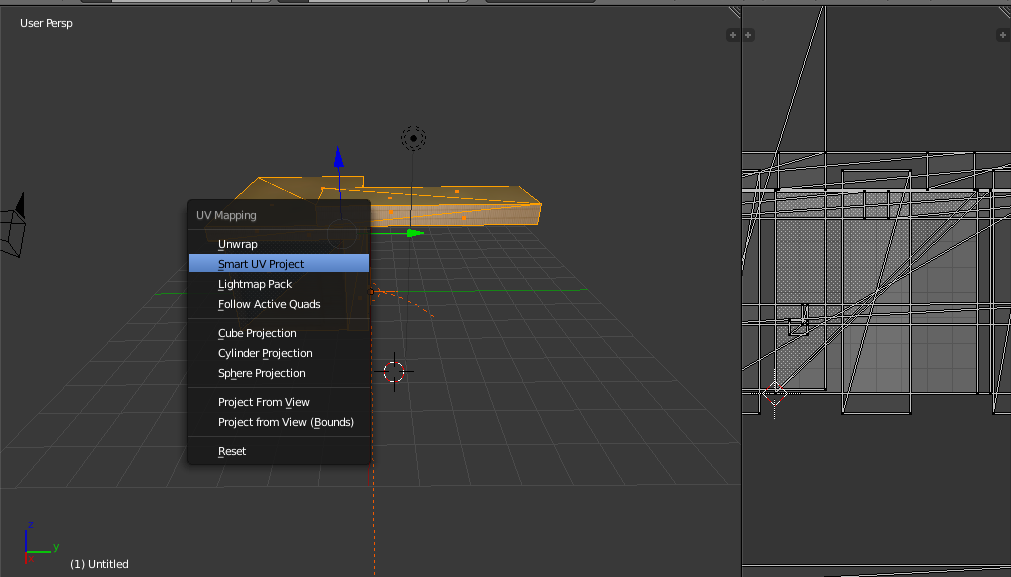 select the model
- Press “u”,and select the “Smart UV project”,then click OK.
 Smart UV project
- Create a new texture,and save it.
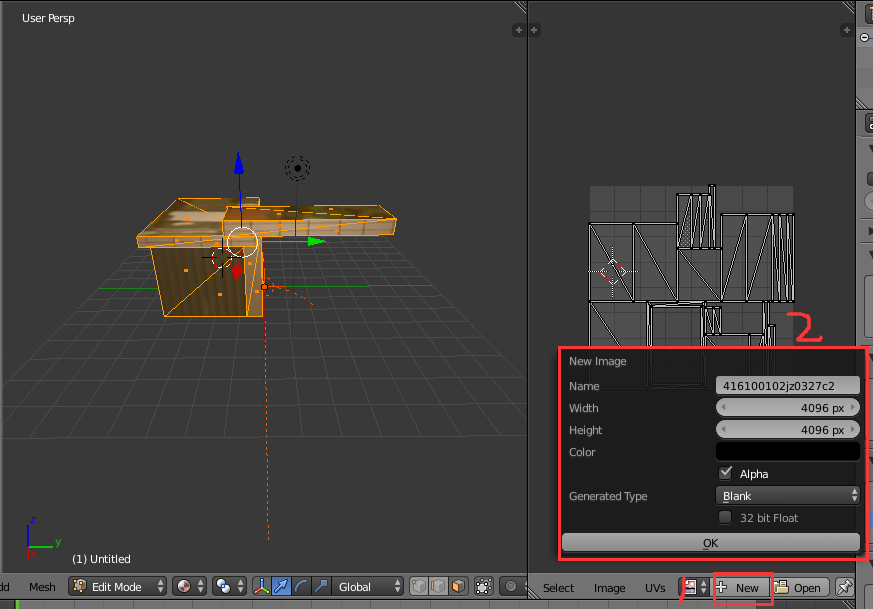 Create a new texture
- In the bake mode,select the “Textures”,and click the Bake.You will find a texture atlas.Amazing,isn’t it? Now save it.
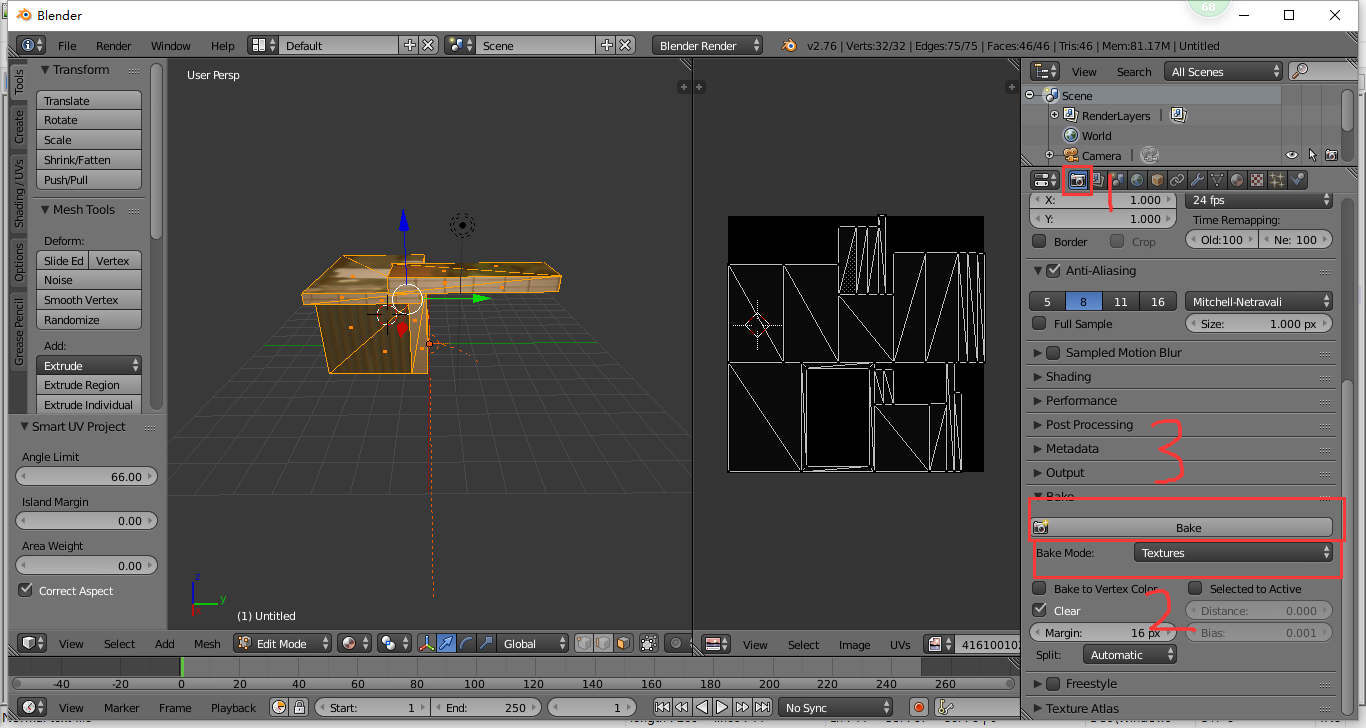 bake a texture atlas
- Delete the origin UV map.
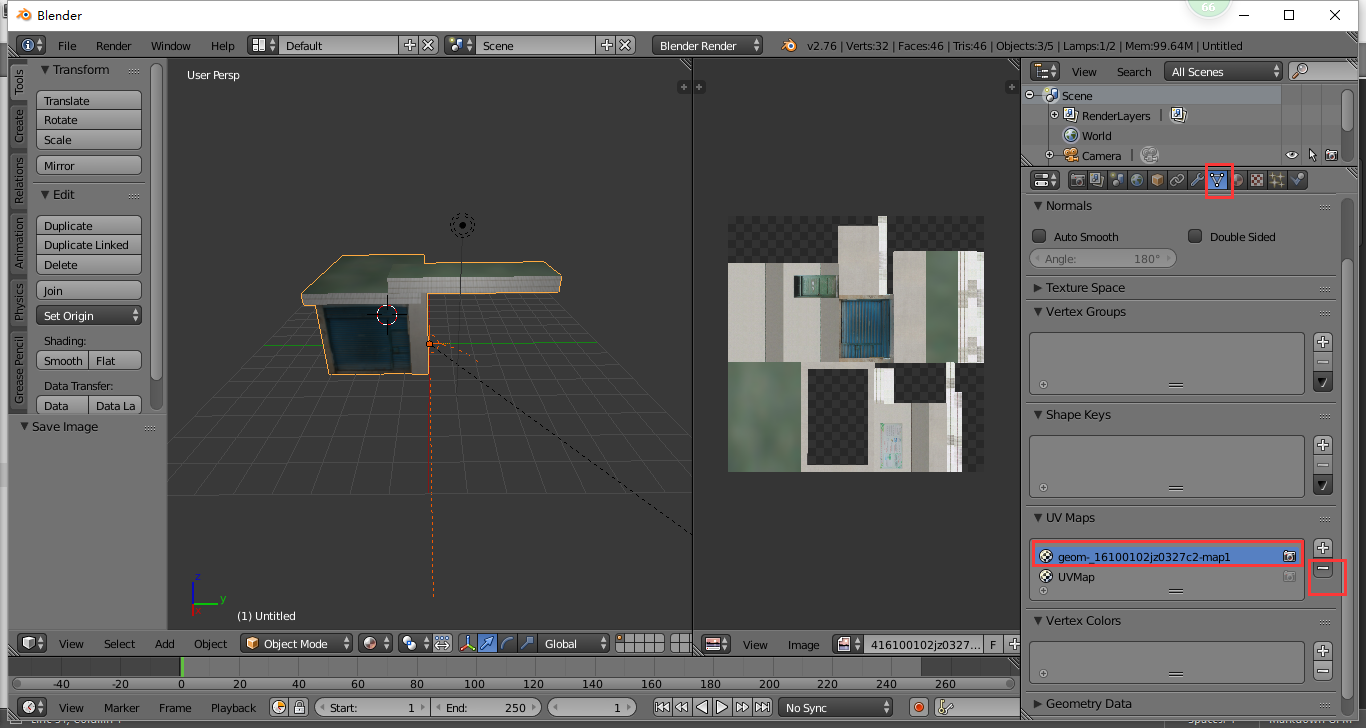 delete the origin UV map
- Delete all the origin materials.
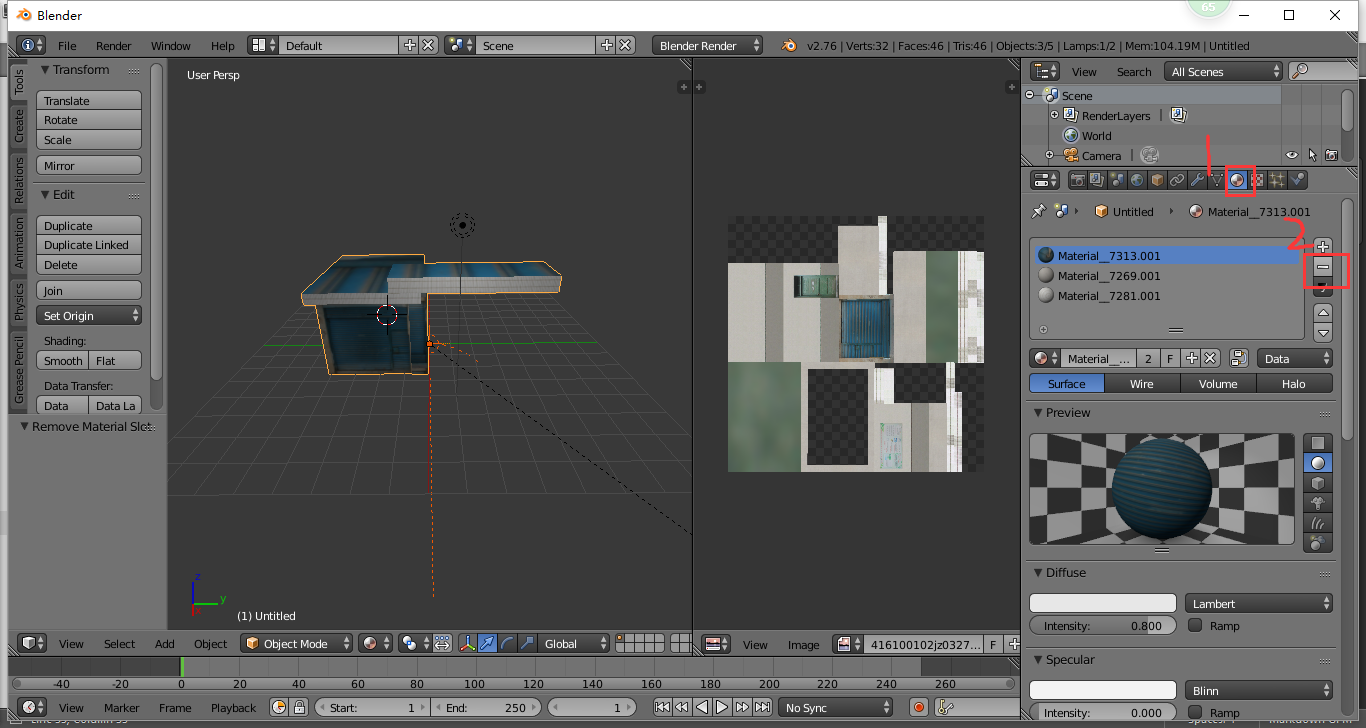 delete all the origin materials
- Create a new material.
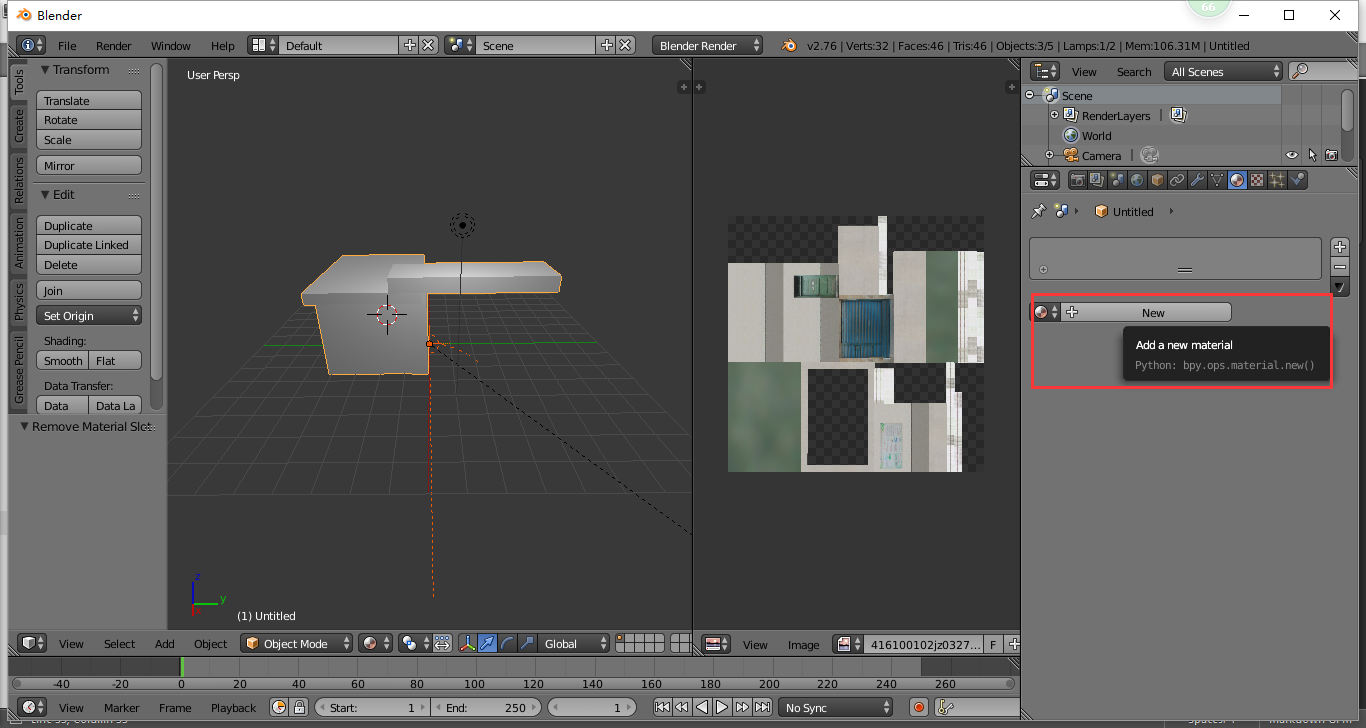 Create a new material
- Create a new texture with the texture atlas which you saved before.
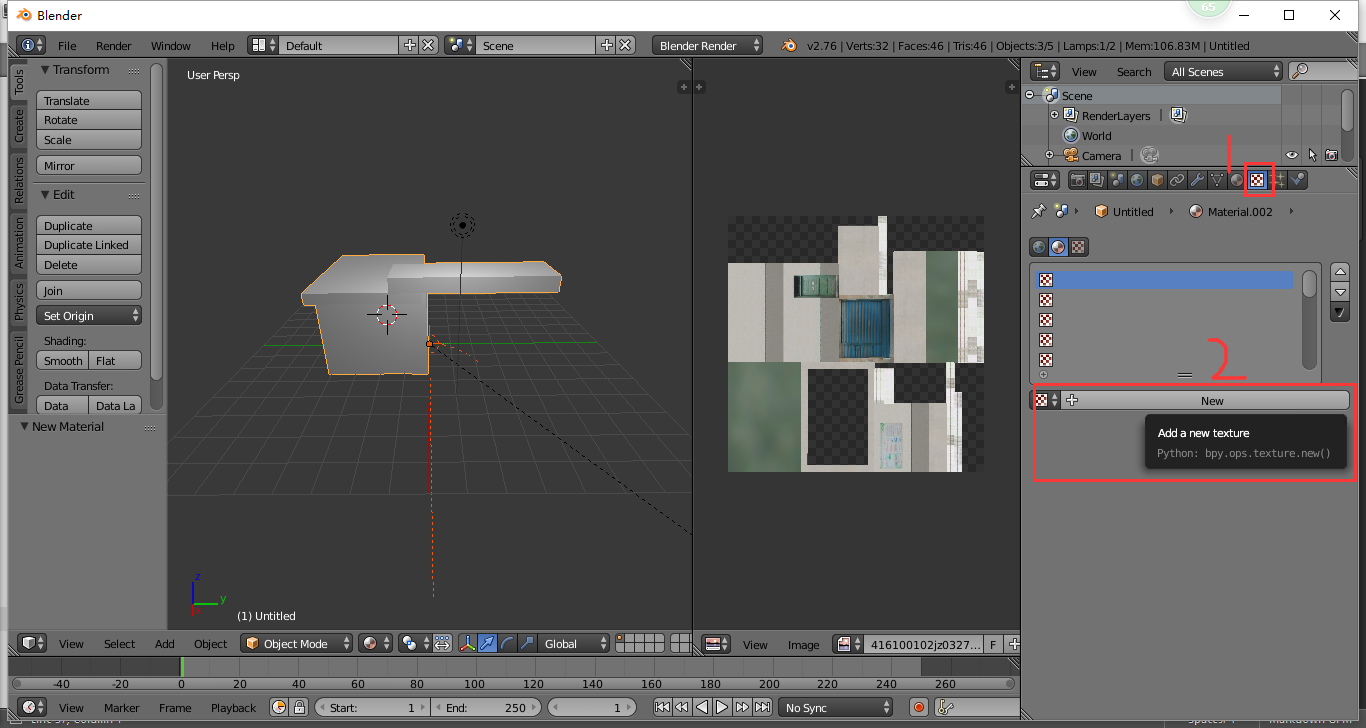 Create a new texture
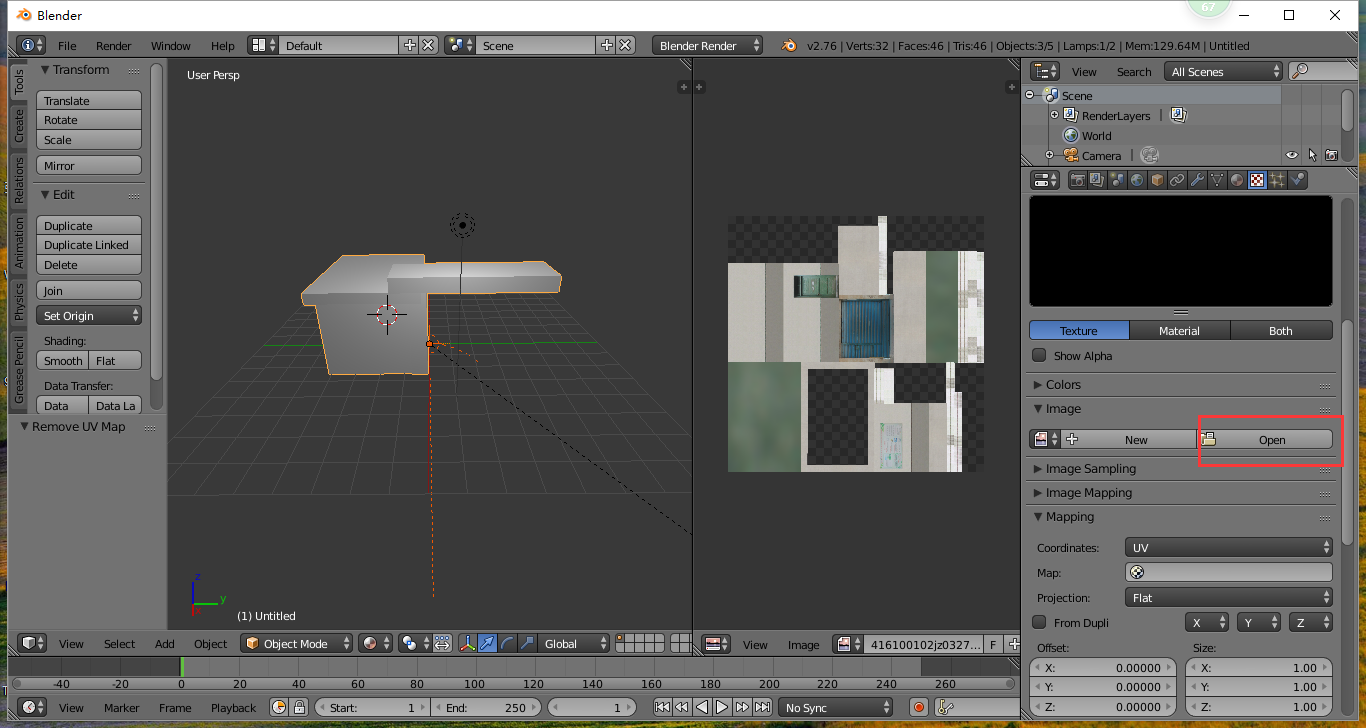 open an image
- Now you see the magic.
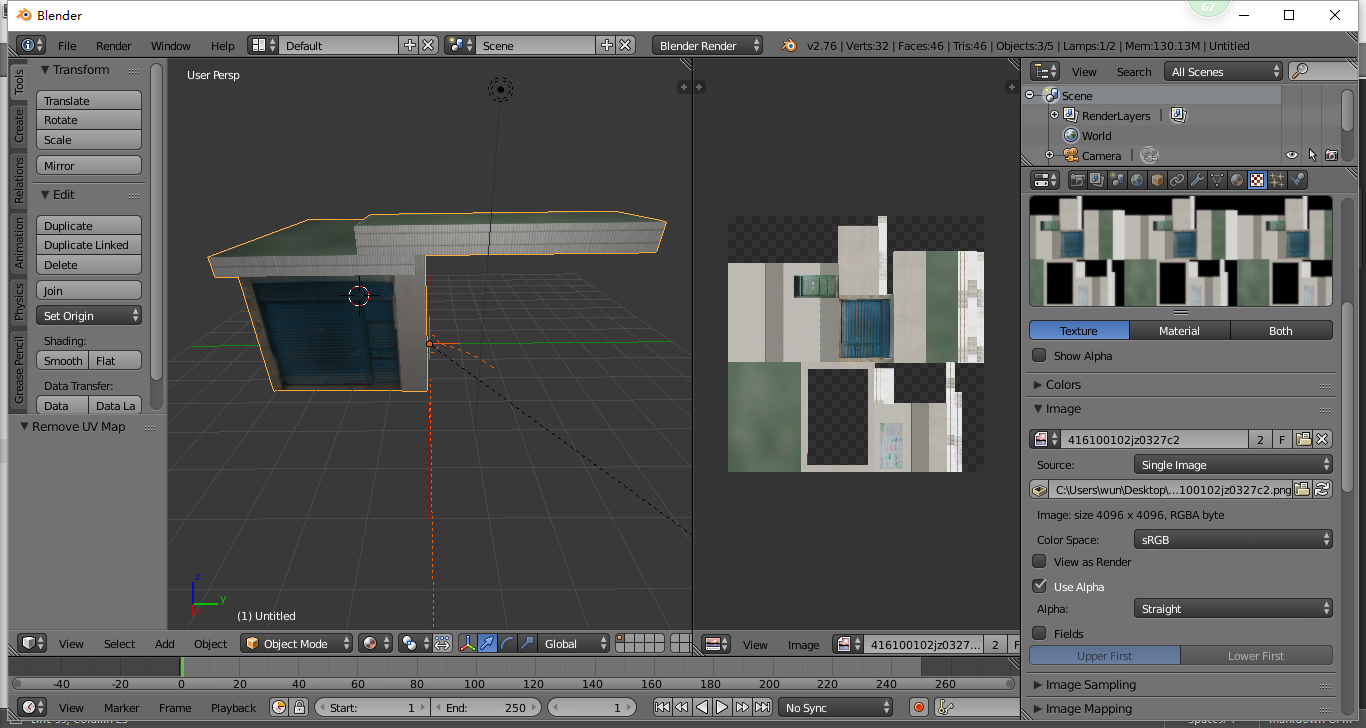
Texture atlases can greatly reduce the number of draw calls and state changes, so they are an obvious and necessary optimization. Have a try.
著作权声明
作者 陈兴旺,首次发布于 WunWun Blog,转载请保留以上链接